Our Wireless NMEA products (WLN10, NavLink, PilotLink, AIT3000 and iAIS) are proving really popular and for customers that have a suitable App or Navigation Software that can read the TCP/UDP network data, then interfacing to them is easy.
Today I was contacted by a customer that had quite old navigation software that only supported serial COM port type connections. These are great for wired connections but cannot read data from the new generation of wireless NMEA devices.
I was just about to apologise and explain that he would have to upgrade his software package (and charts) when I remembered a piece of software that I had found called “NMEA Router” which is freeware software written by UK developer Neil Arundale. NMEA Router allows wireless and wired NMEA data connections to be seamlessly joined together and will even allow multiple programs to read the same serial data by creating a Virtual COM Port.
I quickly downloaded and installed the free software from the Software Informer site or you can also download it from Neil’s site as well. Installation is simple and when you run NMEA Router for the first time, you will need to right click on it and select “Run as adminstrator” as creating a Virtual COM Port (VCP) requires Administrator Access rights.
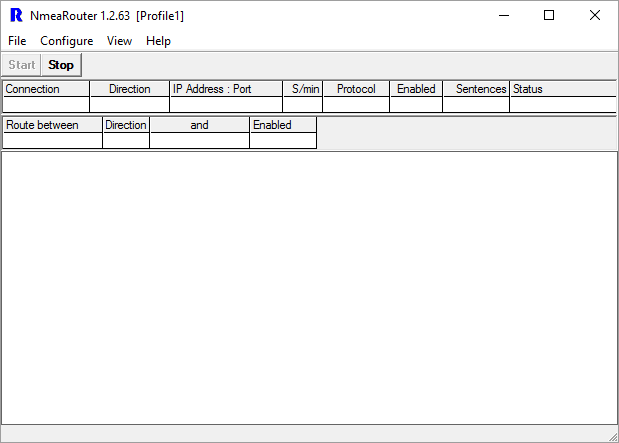
Initially NMEA Router will have no connections defined (see image below) and so your first task is to create two new connections; one for the Wireless TCP/UDP connection and one for the Serial COM Port and also to setup the Virtual COM Port (VCP) which must be done before setting up the Serial COM Port that your navigation software will use.
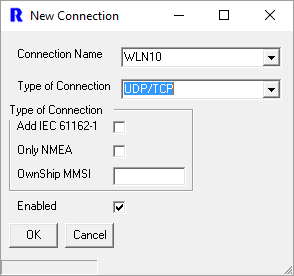
Select Configure>Connection>New and you will see a window like the one below. Give the connection a meaningful name i.e. the wireless product name “WLN10”, select UDP/TCP as the connection type and make sure the Enabled tick box is ticked.
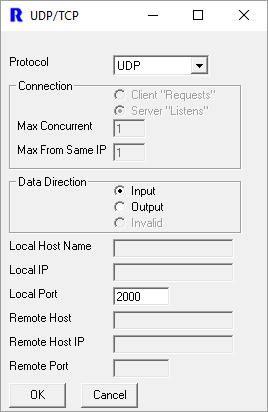
Once you are happy, click the OK button and you will see the following window appear. For most installations, I would suggest selecting “UDP” protocol, which is the simplest to setup. Make sure “Input” is selected and type “2000” as the port (which is the same on all Digital Yacht wireless products).
Now click the OK button and depending upon the version of Windows you are running, you maybe asked to confirm the new Firewall Security Exception. Just confirm/authorise the new Firewall Exception and you will be returned to the main NMEA Router window, but now you will have your new “WLN10” connection shown.
Now we need to setup the VCP, so click Configure>VCP>Create and you will see some old style MSDOS windows pop up and dissappear as the VCP is created. You may also be asked to confirm that you are OK for the program “com2com” to make changes to your PC, which you should confirm as OK.
You should see a new pop-up Window saying that the VCP “COM x” has been successfully created. On my PC it was COM4 but you may be allocated a different number.
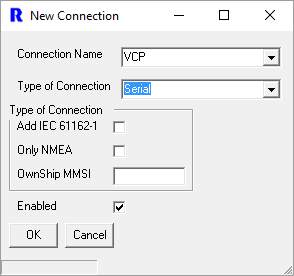
Once the VCP has been created, we can now create the final new connection, so click Configure>Connection>New again and this time give the connection a name like “VCP” and select “Serial” as the connection type. Make sure the Enable tick box is ticked and click on the OK button.
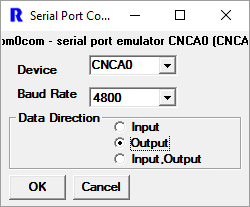
A new window will appear and you need to select the Device from the drop down list. There should only be two devices listed and you want the one that is not “COM x”. As you can see from my example below it will be something like “CNCA0” and is the name that Windows has given to the VCP input, not COM4 which is the VCP output that you will configure in your navigation software.
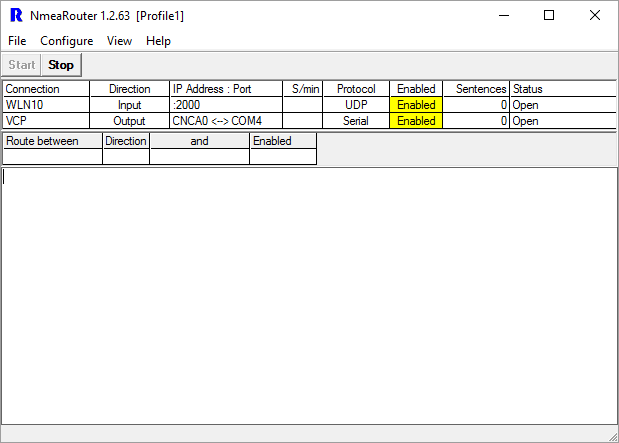
Make sure that “Output” is selected and that you have set the baud rate to a suitable speed. If in doubt set the highest speed that your navigation software can handle. Now click the OK button and you will be returned to the main NMEA Router window again and both of your new connections will be listed.
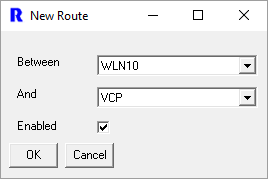
Finally we need to join the two new connections together and to do this we need to create a Route. Click on Configure>Route>New and you will see a window like the one below.
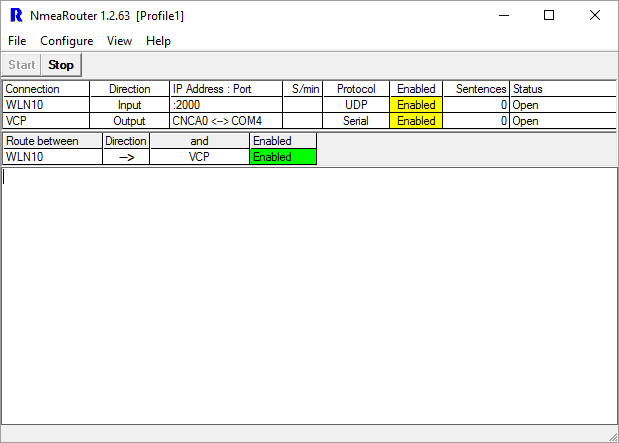
If you only have the two connections setup, then the “Between” and “And” fields will be automatically set, so all you need to do is tick the “Enabled” tick box and click the OK button. You should now be returned to the main window with the two connections and the route shown.
If you now turn on the boat’s electronics, you should see data start to scroll down the window as it is received from the WLN10 and routed to the new VCP. If everything is OK, click File>Profile Save and all of your settings and connections will be saved, so that they automatically get applied when NMEA Remote is next run.
All that remains to be done, is to set your navigation software to look for data on whatever COM Port number the VCP created and set the baud rate so that it matches what you set in NMEA Router.
There are lots of other things that NMEA Router can do, for instance, it is possible to get it to automatically run when Windows Starts up, but that is outside of the scope of this blog post. NMEA Remote is pretty well documented and I suggest refering to the guide on Neil Arundale’s website.


