


Time and again we see faults in marine electronic installations caused by bad or failed connections. Normally the harsh marine environment is the cause, with corrosion eating away at the electrical contacts. However, poor assembly of wiring connections is also a major culprit.
Digital Yacht’s products, like many other modern marine electronic systems, feature multi-core cables with relatively small power and signal wires. Lower power consumption, digital interfaces and the drive for smaller and smaller product sizes, has led to most electronic wiring in modern boats, using 24 AWG sized wires or smaller.
These smaller wires do create a challenge though when it comes to connecting them to the boats DC electrical system. This generally uses much larger gauges of wire and has large crimp and screw terminal type connectors.
Traditionally, those distinctive Red, Blue and Yellow insulated terminal crimps have been the most popular way of connecting low voltage DC wires in Boats, Cars and Caravans. They are cheap, commonly available and assembled correctly can make a very reliable connection. However, they can also create problems when assembling is poor.
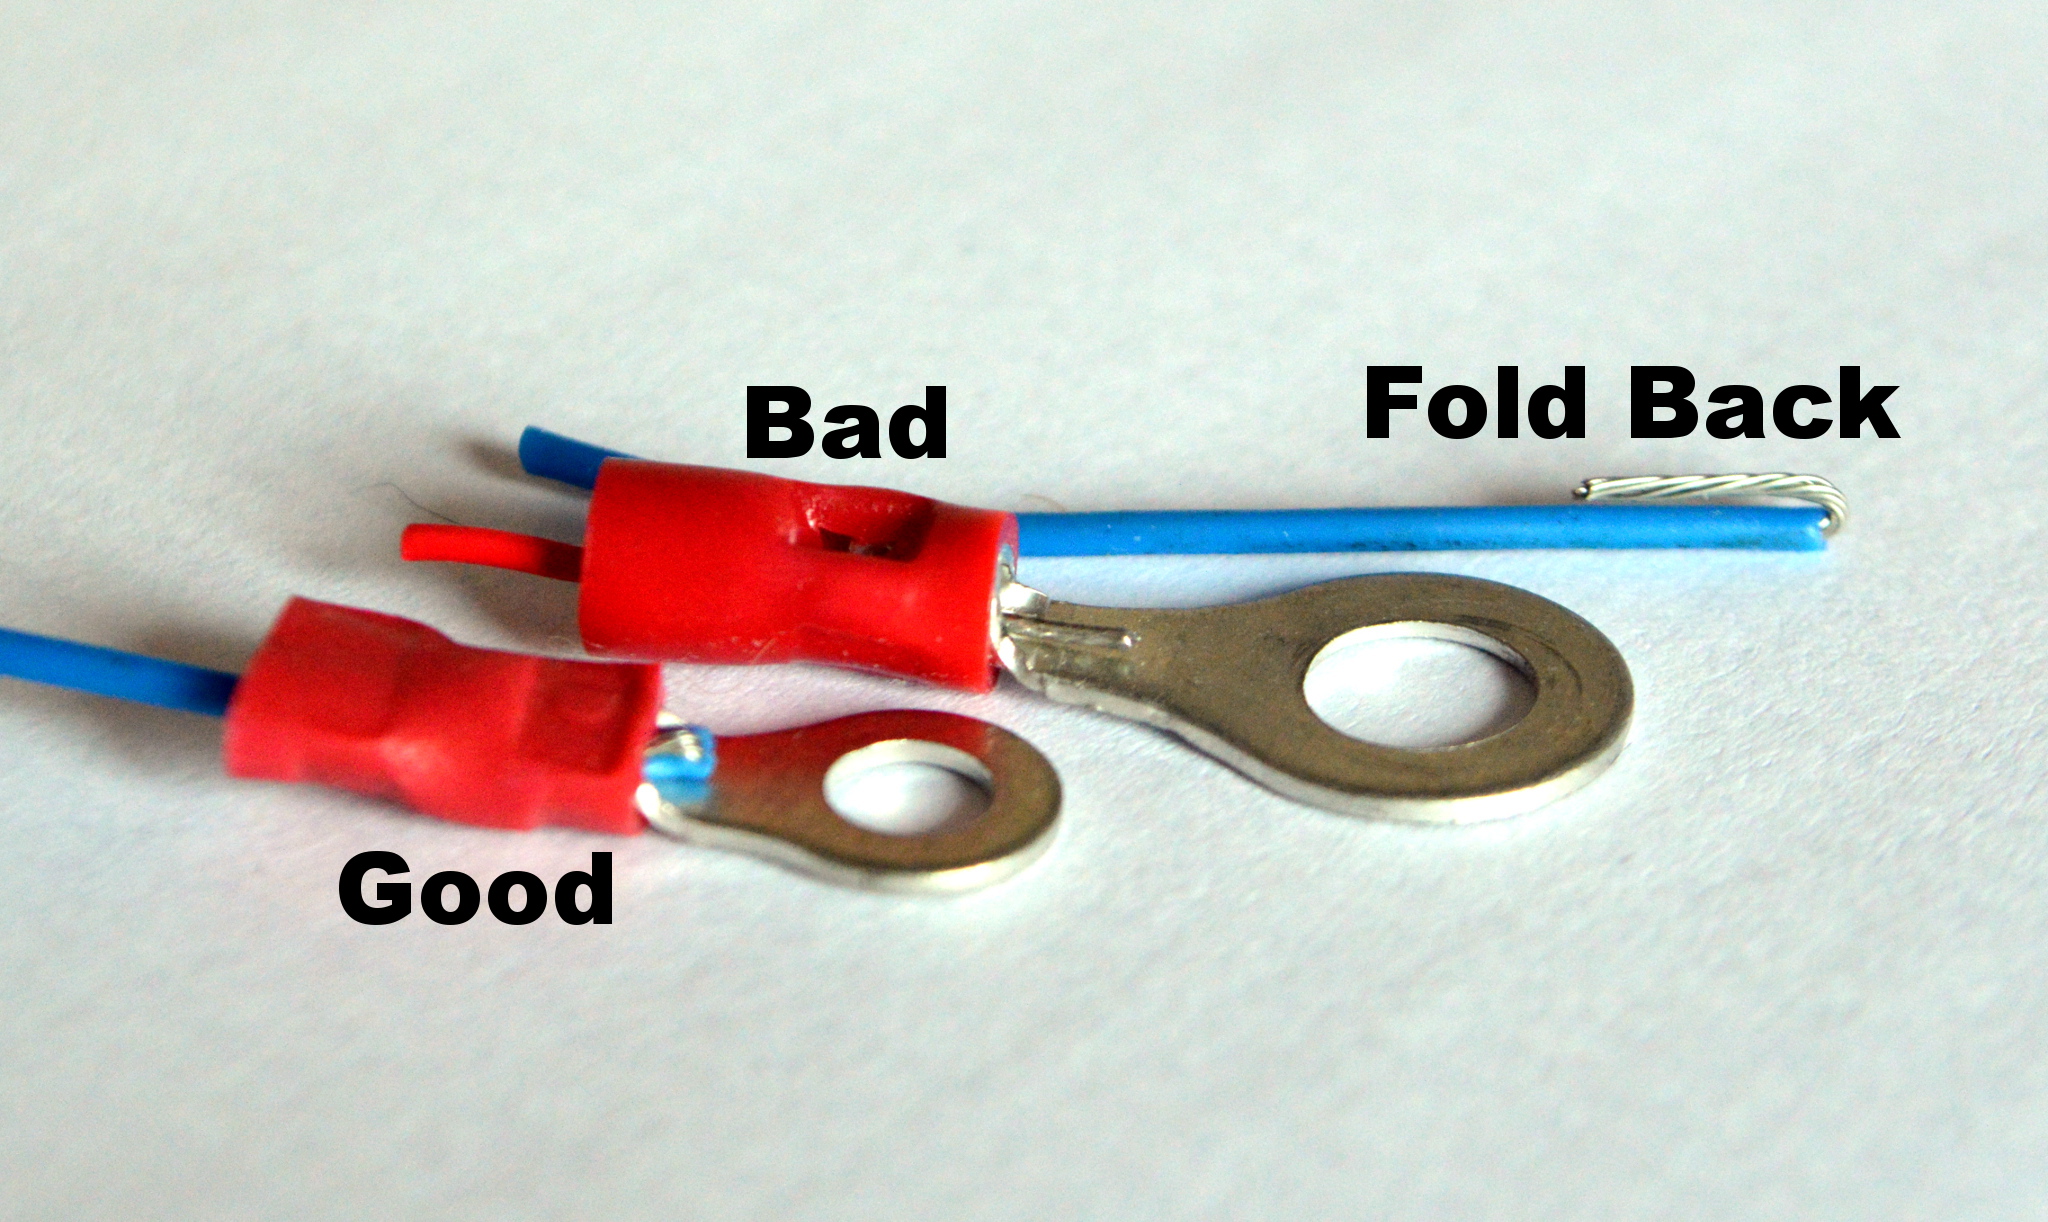
Take the image above, where the two crimp connections appear at first glance to be OK. You can see the wire protruding slightly through the insulated ring and the crimp has been compressed to push down on the wire. However, appearances can be deceptive and the upper crimp attached to the positive power wire of one of our AIS units, was not making a connection with the red wire. When we cut the crimp off and did a resistance test, it was completely open circuit (no electrical connection).
There are five simple steps to successfully crimping small wires:
1) Strip the wire, being extra careful to not damage any of the internal strands of wire
2) Give the strands a quick 180º degree twist to make them less likely to splay out
3) Fold the exposed strands of wire back on the insulated wire (as shown in the image below)

4) Insert the wire in to the crimp so that it just protrudes out of the insulated ring
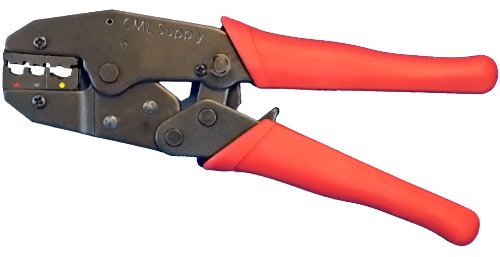
5) Use a proper ratchet type crimp tool (see image below) and make sure the crimp sits in the “Red” labelled recess of the jaws
NOTE: Always use the smallest “Red” range of crimps and never the Blue or Yellow ranges
There are two reasons for bending the stripped strands of wire back on to the insulated wire. Firstly it provides more material for the crimp to bite down on. Secondly, if the wire is subsequently pulled or tugged, the strain is not taken just on the stripped wire but also on the insulation as well. Thus creating a much stronger mechanical join.
Having the right tool for the job is also important. Those cheaper crimp tools that you often see included in the box with a mixed set of crimps are just not up to the job. For approximately £10-£15 pounds you can buy a proper ratchet type tool. This will consistently make good crimp connections for the life of the tool.


Excellent and decent post. I found this much informative. I’m impressed by the details that you have on this web site. Thank you for this post.
First of thanks for sharing amazing articles. I read your whole article about crimping small wires and I absolutely enjoyed every part of it and I also have you saved as a favorite to look at new things on your website.