


In order to facilitate the use and configuration of our AIS transponders, our new AIS transponders now have a built-in web interface. This is the case for the iAISTX, iAISTX Plus and AIT5000 (since March 2020). These devices create a WiFi network on board and configure themselves by connecting to WiFi. The configuration of the transponder can therefore be done through a computer, a tablet or even a smartphone and most importantly, no software is required. Our other transponders can only be configured through a computer by connecting the USB and downloading a specific software (ProAIS2).
If you have an AIT1500, AIT2000, AIT2500 or Nomad, then please click here as you must configure your unit with ProAIS2.
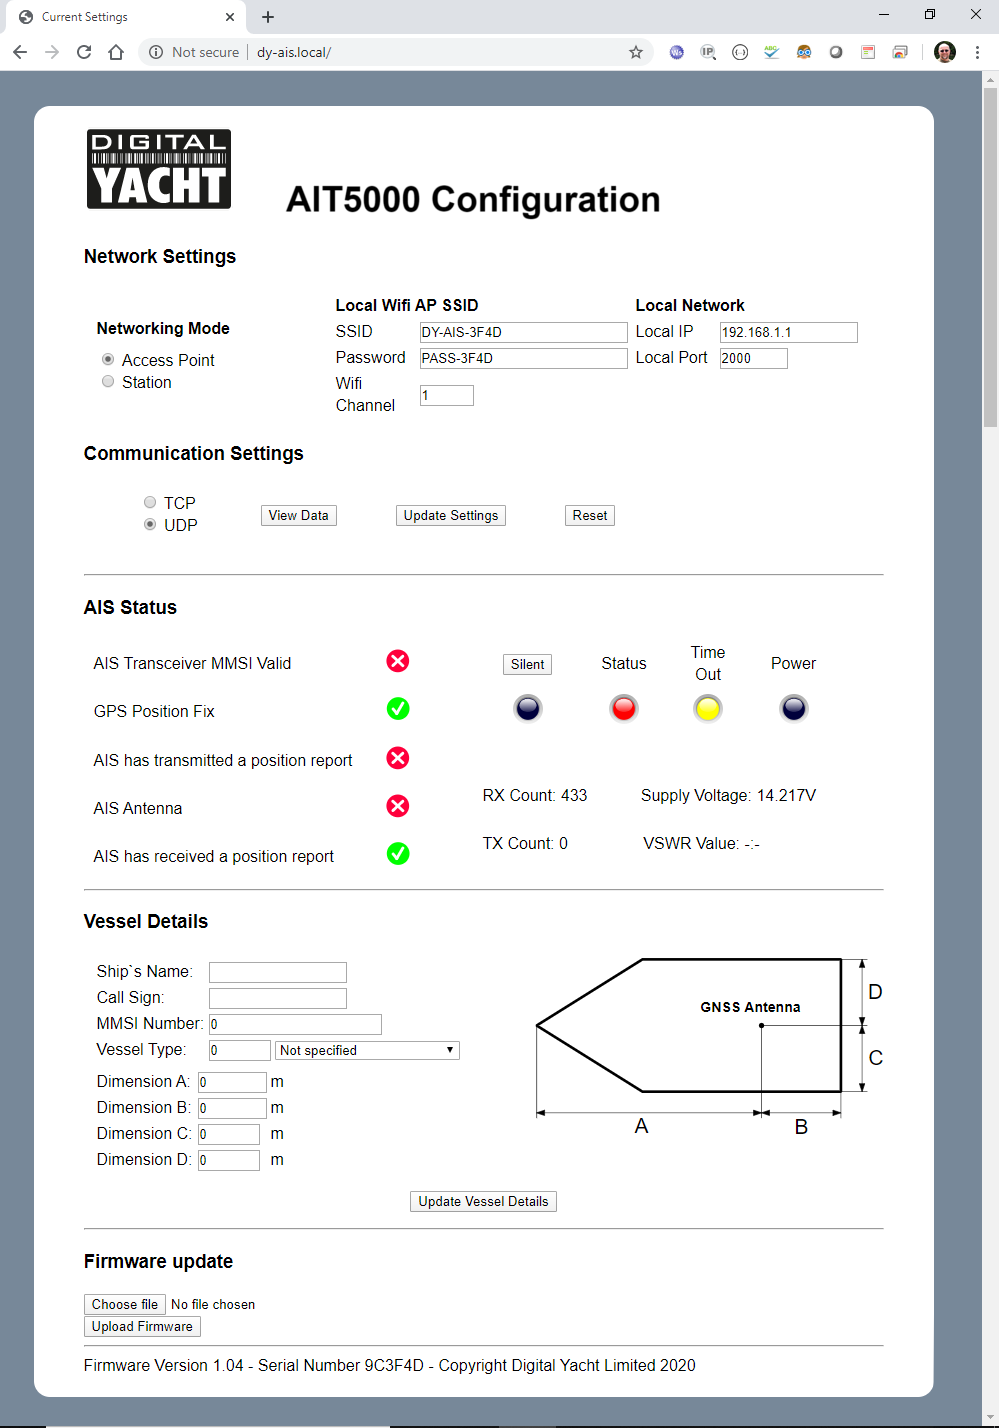
After installing and powering the device, here is the procedure to configure the AIS transponder through the web interface.
1 – How to access the web interface
You need to connect to the WiFi network created by the AIS transponder (network name: DY-AIS-xxxx) . If the WiFi network has a password, then the password is: PASS-xxxx (xxxx is a 4-digit code unique to your device and is the same as the 4 digits on the WiFi network name).
Then, open a web browser (Safari, Chrome, Firefox, Edge, etc.) and either enter the IP address of the transpondeur…
http://192.168.1.1
…or if your device supports Bonjour/mDNS you can enter the following URL…
http://dy-ais.local
2 – Vessel details
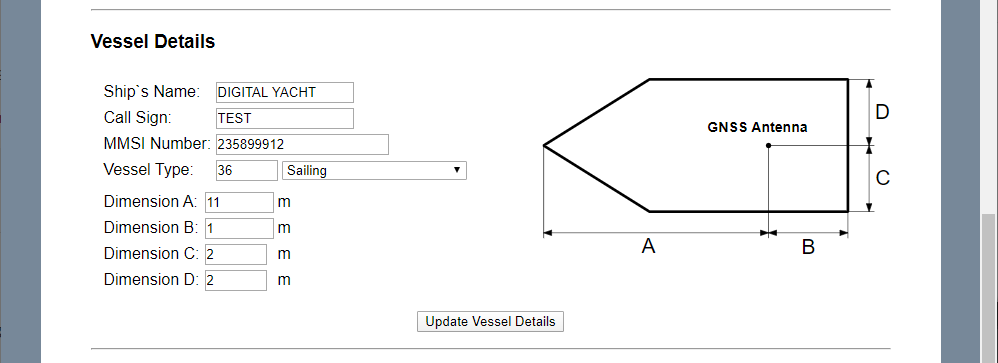
This is the section in which you enter the MMSI and Static data to program the transpondeur. The MMSI number can only be programmed once, so particular care should be taken to check that it is correctly typed in. All other data can be changed at any time. You need to enter your boat dimensions and an approximative location of the GNSS antenna.
Once you are happy that all your boat’s static data has been entered correctly, remembering to double check the MMSI number, click the “Update Vessel Details” button and the details will be stored in the AIS unit.
3 – Network settings
By default, the AIS transponder is in “Access Point” mode, that means it creates its own password protected wireless network and automatically provides network settings to any device that connects to it (via DHCP). You can change the default network name and password, if required, and the wireless channel that the unit uses (Channel 1 by default). For the rest of the network settings, we recommend that you do not change anything.
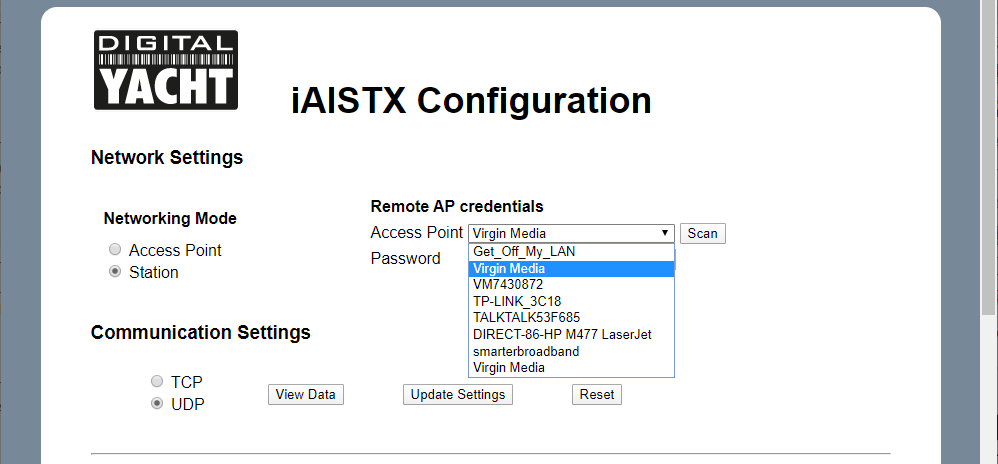
If you want to merge the AIS’s WiFi to an existing WiFi network on board, please read the unit manual which you can download from here.
Once everything is configured for the network settings, click on “Update Settings” button and the unit will save the new settings and restart (it takes about 30 sec).
4 – AIS Status and Silent Mode
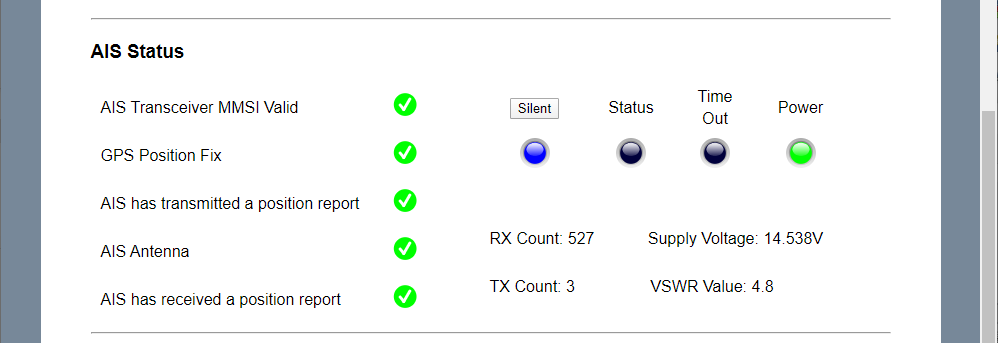
This section displays the correct operation of the AIS transponder once it is properly configured and installed. This section also allows you to activate the silence function. A series of simple icons give an immediate indication of correct operation and you also have a number next to RX and TX to show how many targets have been received and how many times the AIS transponder has transmitted the position. This section also displays the power supply and the Voltage Standing Wave Ratio (VSWR). A good VSWR ratio should be no more than 2.5. If the radio is higher then it is due to a bad VHF antenna, VHF splitter or VHF cable.
To switch the AIS transponder in to “Silent Mode”, click the “Silent” button and the blue Silent LED should illuminate. To start transmitting again, simply click the “Silent” button again and the blue “Silent” LED will go off and as soon as the AIS Transponder makes its next transmission the green “Power” LED should illuminate, and this indicates that everything is working correctly, with all self-tests passed.
5 – View NMEA data and product firmware
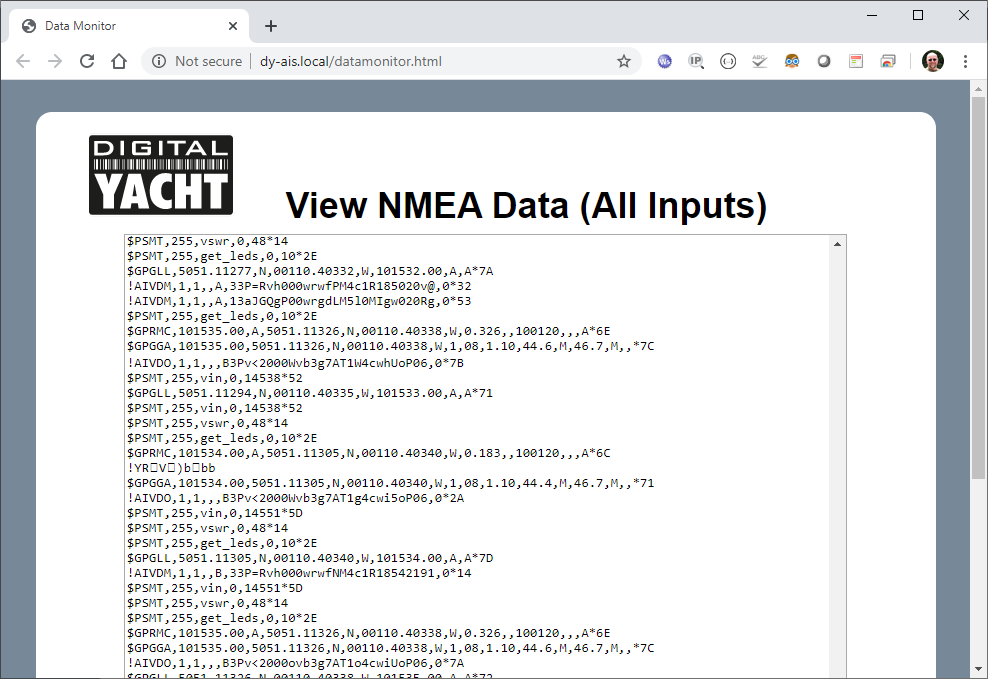
Thanks to the web interface, you can also display the NMEA 0183 frames broadcast by the WiFi of the AIS transponder. You have to click on the “View data” button at the top of the web interface. If you have connected instruments to the NMEA 0183 input of the AIT5000, you will also be able to see the data of these instruments in this page.
At the bottom of the web interface, you can update the product when an update is available. Simply select the file in your computer or tablet with “Choose File” and then click on “Upload Firmware”.

Bonjour !
J’ai acheté, avant Mars 2020, un transpondeur AIS AMEC. Cet appareil est-il éligible à la configuration avec le web interface ?
Cordialement
Bonjour,
Cette fonctionnalité est unique et réservé aux transpondeurs AIS de Digital Yacht. Nous ne fabriquons pas les transpondeurs de AMEC donc votre transpondeur AIS de AMEC n’a donc pas cette fonctionnalité.
Cordialement